Showing posts with label Sewing. Show all posts

Wednesday, 2 December 2020

Handmade Skirt


I'm so excited to be finished my most recent sewing project! It is a plaid skirt, stitched entirely by hand, and roughly based on a drafting pattern from 1895.

This past summer I discovered the joys of sewing by hand. There is something about it that I find very peaceful. It is slow going, (the skirt took me almost two months to complete!) but it is something I can do while life carries on around me. I can bring it outside and sew while the boys ride their bikes or dig in the gravel pile. I can sew while curled up on the couch listening to my husband reading Discworld. I can even sew while I listen to the sermon on Sunday, because church is online for us these days. And I know that it will take a long time. There is something about using the sewing machine that makes me feel like I should be able to whip something up in a couple days. When I am hand sewing I know that it will take weeks, and I am okay with that.


Having received a small stash of fabric in the summer, I knew I needed to make a few things, and I loved the idea of using this lovely plaid fabric to make a skirt. I've had an increasing interest in historically-inspired fashion, so when I found a historical skirt drafting pattern from 1895, I knew I wanted to try it! (Check it out here: An 1895 Skirt.) I didn't have enough fabric to make it exactly as instructed, but it was fun to try to decipher the directions and make it work with what I had. My end result is not nearly as long or full as it should be historically, but I am impressed with how comfortable it is and how well it fits! I found joy in making it as well as I could, taking the extra time to make small, even stitches, and finishing the seams in a historical fashion. It looks just as nice on the inside as the outside!


It was my first time trying to work with a historical pattern, so there are a few things I would do differently next time, but overall I am very pleased with how it turned out. I think it's going to be a favourite of mine!


Thursday, 21 September 2017

Dress Alterations


A few weeks ago I found this dress at our local MCC thrift store. I loved the fabric, but I didn't really like the style of the dress. It was, however, only three dollars, so I decided to get it and see if I could turn it into a dress that I did like!


The part of the dress that I especially didn't like was the top. I don't like how that style looks on me, and I tend to avoid strapless dresses, especially with little kids who are constantly tugging on my clothes! The dress was also a size too big for me.


The first step was to remove the smocking. I figured that this would be a time-consuming process, but it turns out that if you pull the stitching in just the right way, it unravels and comes out without much fuss at all! I also took apart the top six inches or so of the side seams.


I decided to hand-sew this project instead of using my sewing machine. The fabric of the dress is quite slippery and I was concerned that I might run into difficulties if I used the machine. Hand-sewing is more time consuming, but that didn't really matter because there wasn't much sewing I needed to do. Also, there is something about sewing by hand that makes me feel like I'm pioneering like a boss, even if I don't live in a little house on the prairie.

First, I sewed shoulder seams along the top of the dress, turning what had been the top six inches of the side seams into armholes. Then I had to hem the armholes. And that was it! I decided that I wouldn't worry about a waistline, and instead just wear it with a belt.

I am quite pleased with the final result!


Friday, 19 May 2017

Circle Skirt


Earlier this year when I was making my full circle wrap skirt, I went looking for fabric at thrift stores. I did find some fabric that I really liked and thought would make a great skirt, but unfortunately there wasn't enough of it for that pattern. I got it anyway, with the idea that I could make another skirt with a different pattern. I really love full circle skirts, so I referred to this tutorial and this tutorial and then just kind of made things up as I went.


The fabric wasn't wide enough so I had to sew two pieces together, but I was able to line up the pattern so you can't tell. Then I measured and cut it. I had no idea how a striped circle skirt would end up looking, but it is actually really neat!


I added a waistband and a zipper. I also added pockets, because I could. And because it is wonderful when a skirt has pockets!


I was very happy with how it turned out. I think it's neat how the stripes combine with the circle shape to make the pattern look different depending on which way you look at it!


Thursday, 6 April 2017

One Hour Projects: Bandana Bib


I usually tutor on Thursday afternoons. Occasionally, the student cancels, which means I get to have some extra free time! (Since I already have someone taking care of the kids, I may as well take advantage of it!) It was that kind of day today, so I thought I would try doing a project that I could start AND finish, all within that one hour.

I already had a project in mind: making a bandana bib. Very cute and very practical - Kenneth is drooling up a storm these days! I found a great tutorial that you can check out here.


I used odds and ends from my box of fabric - an old tank top that I was saving for some sort of project like this, and a fifty cent receiving blanket I had picked up at a thrift store for a different project.


I printed out the pattern from the tutorial and cut one from each kind of fabric.


I pinned them right sides in, and sewed them together - making sure to leave a gap so I could turn it right side out!


Then I pressed it, folding in the gap so it looked like the rest of the seam.


And I finished it off with a top stitch.


I had some snaps left over from an old project, so I used one of those as the fastener.


One bandana bib, finished in exactly one hour!


Thursday, 2 February 2017

Full Circle Wrap Skirt


I think everyone has one: that piece of clothing that you've had for years and keep wearing because it's just so nice and comfy. For me, that was a black skirt that I've had... well, I can't even remember when I got it, that's how long I've had it. I can distinctly remember wearing it at theatre camp in the summer of 2006, so I've had it at least 11 years, but probably quite a few more. Let's just say it's getting pretty worn out. Finally this winter it was time... time to replace the skirt.

In order to be a suitable replacement, a skirt would have to be comfortable and all-purpose, able to survive anything from a day running around with the kids to hiking a mountain, as well as making me feel pretty and being nice enough to wear to church. That's a pretty high standard!

I didn't have much hope of ever finding such a skirt by chance, so I decided to try making one. After some Pinterest research, I settled on this tutorial.

The next challenge was finding fabric, since fabric isn't cheap, and I was going to need a lot. Thrift stores often have fabric, but rarely in a large enough quantity. I ended up going to check out a local fabric store, and it turned out that they were having a sale that day and their clearance fabric was 50% off! I found some that I liked, and although it only had 3.5 metres left, I figured I could make that work. (I did, barely.)


The first step was cutting out the pattern. Well, the FIRST first step was folding the fabric in half and laying it out flat, which was probably the hardest part of the whole project. I chose a "knit" fabric that is stretchy and flowy and lovely, but wow it did not want to lie flat.

So once THAT was done, I began measuring out the pattern. My fabric was a bit too small so I had to fudge it a little by making one side the length that I wanted the skirt and the other side a little short, but because it is a wrap-around I figured I could get away with it.


After marking out my pattern and pinning it within an inch of its life, I cut it out. Because the fabric was folded in half "right sides in" (does a knit even really have a right side?) I cut both pieces at once.


Then I pinned and sewed together the one seam needed to attach the two sides of the skirt. Then, in theory, the skirt was done!

In theory.

It did work, but because the fabric was stretchy and heavy the nice waist that I cut exactly the right size for me stretched to be way too big for me! The skirt is supposed to go around your waist twice and it went around three times. So it still worked as a skirt, but kind of defeated the purpose of having a full circle skirt (which is that it is super flowy and full and spins really well). So after some problem solving I decided to add a waistband - one that isn't stretchy.


Digging through my box of fabric I found a brown sheet that I think was a candidate for being made into a cloak at one point in time. It was an almost-shimmery fabric, and I liked the colour combination with my purple skirt. And along the end it had nice band of fabric that was just the right length and had a seam all ready to go! I just removed it from the sheet with a seam ripper and sewed it onto my skirt.

Though only time will tell if my new skirt will live up to it predecessor, I am very pleased with how it turned out!


A special thanks to Jesse and everyone else who took care of the kids on several occasions so I could work on this project!

Thursday, 1 December 2016

Stuffed Sting Sword


As I was deciding how to dress Steven up as Bilbo Baggins for Halloween this year, I came across an interesting dilemma: How do you show that he is the hobbit, not just a hobbit?  Clearly the answer was that he needed to be carrying Bilbo's iconic sword, Sting.  I actually have a replica of Sting that I got when I was a teenager to use with my Frodo costume.  (We used to dress up as characters from Lord of the Rings and hike up mountains.  Yeah, we were pretty awesome.)  However, giving an energetic almost-two-year-old an actual metal sword to carry around seemed like a pretty bad idea.  So I wasn't sure what to do.

Then I came across this blog post that explained how to make a plush Sting.  That was my solution!  It seemed doubly fitting, since we still have a plush sonic screwdriver from Steven's 11th Doctor costume last year.  Naturally, I didn't follow the pattern I found on the internet - I wanted to make mine better!


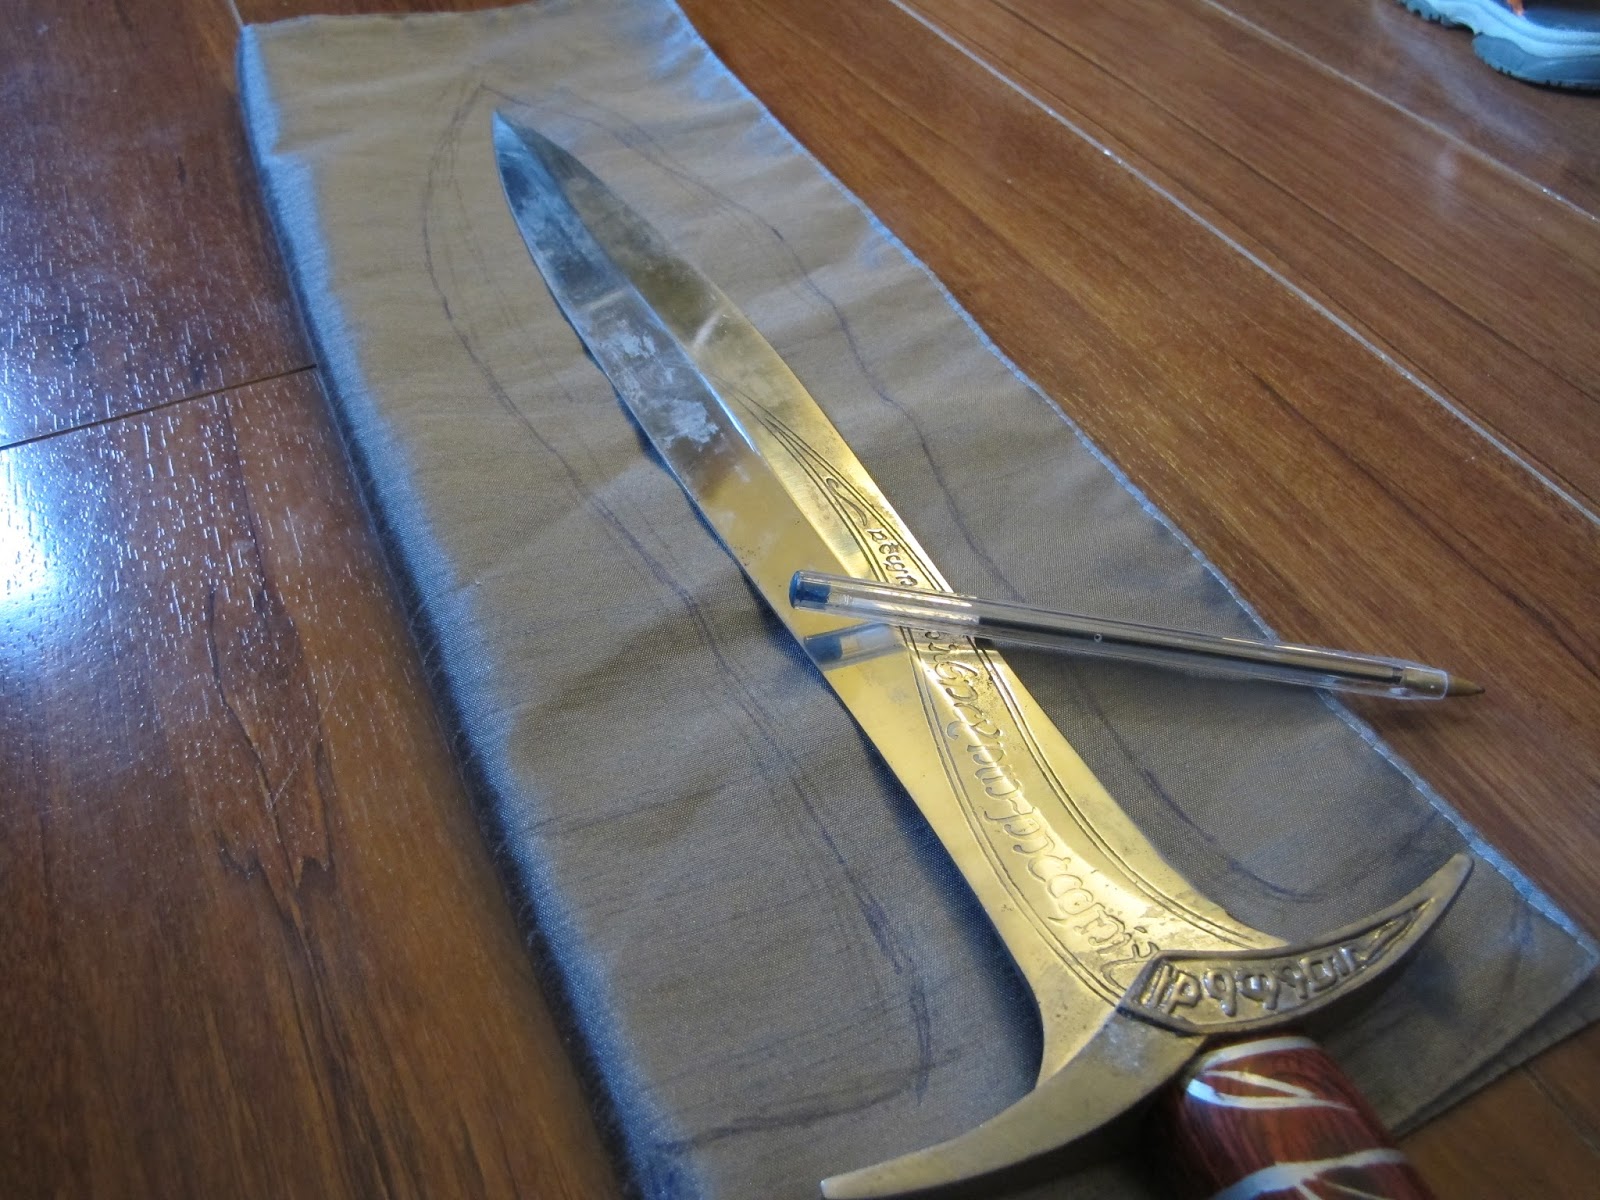
The main trick was finding the supplies I needed at such short notice.  (I decided I wanted to make it only 3 days before Halloween!)  Thankfully, I found a silver fabric placemat at a local thrift store - that worked for me!  I got a dowel out of my craft box, and found some brown fabric in my box of random fabric in the attic.  And of course, I had my replica of Sting to use as my pattern.


The first thing to do was trace the pieces I would need to cut from the fabric.  I traced quite widely around the sword, since I knew a sword made out of fabric and stuffing would have to be quite a bit bulkier than the original.


I cut the blade and guard together out of the placemat (one for each side), cut the grip out of the brown fabric, and cut the pommel and decorations out of the placemat.


Then it was time to start sewing!  I excavated my sewing machine and table (I hadn't done any sewing projects in a really long time!) and decided to use off-white thread, since I didn't have any silver.  I also had to be really quiet about it, since it was right outside of Steven's room where he was sleeping!


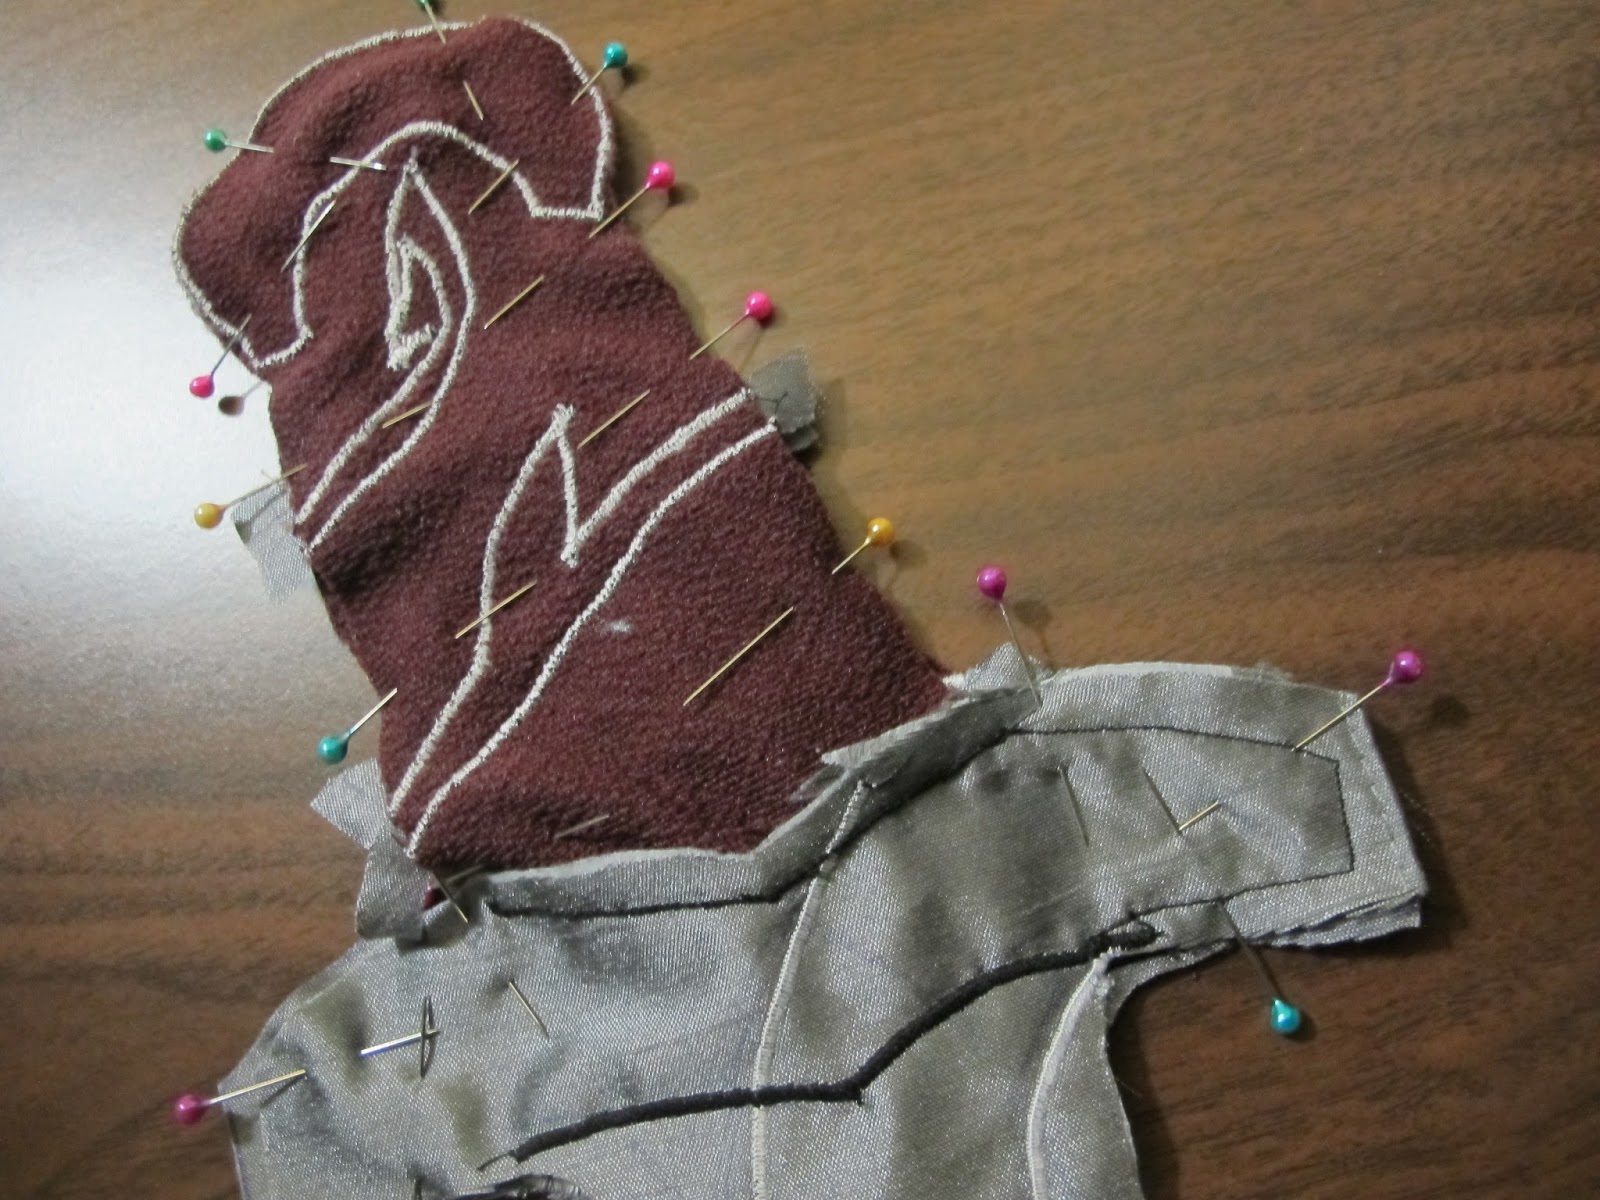
I started by using a tight zigzag stitch to attach the silver pommel and decorations onto the grip.


Then I used the same stitch to make a line between the blade and the guard and to trace the blade's design.


Then I pinned the two pieces together (right sides in!) and sewed them to make each side of the sword.


The two halves of the sword!


Next I pinned and sewed the two sides of the sword together, right sides in, and sewed it, making sure to leave a gap so I could turn it right-side-out.


Evidently I did not leave a large enough hole for turning the sword right-side-out, because that was the hardest part of the whole process!  But finally I managed it after a lot of effort and some definitely-not-swearing.  Then I used a dowel to poke out all of the corners and edges.


Then it was time to stuff the sword!  I put a dowel in the middle so that it wouldn't be floppy, and I packed stuffing around it.  I used some of the stuffing from an old pillow that I use for projects like this.


And finally, I hand sewed the final gap closed.  I am so pleased with how my "Stuffed Sting" turned out!  And I love that I can pass my love of crafts and Lord of the Rings on to the next generation.